How to Choose a Photo Scanner That Saves to USB
The best photo scanner to USB depends on what you mean by USB: some scanners save directly to a USB drive, while others use USB to connect to a computer that saves the scanned files.
On this page (5 sections)
The best photo scanner to USB depends on the connection you need. A scanner may save directly to a USB flash drive, or it may use USB to send scans to a computer where the software saves them.
That difference matters because ordinary computer USB connectivity does not mean the scanner can write files to a USB drive by itself. Many buyers see a USB port and assume the files will go straight to a thumb drive.
In practice, USB often means the scanner is simply talking to a laptop or desktop. The computer then decides the file type, name and folder.
Before you buy, check the storage workflow, photo size limits, scan resolution and power needs. Those details decide whether the scanner fits the way you actually work.
Think about where the finished files should live after scanning. A computer workflow can be ideal if you want to review each image and organize it right away.
A direct storage workflow may suit someone who wants to scan away from a desk. That feature still needs clear confirmation in the product details.
Photo size matters too, because some scanners accept only standard prints while others handle longer or wider items. Resolution matters as well, since higher settings create larger files that take more time to save and share.
Power needs complete the picture. Some models draw power through USB, while others need a separate adapter even when USB carries the data.
Checking these points before you order can prevent disappointment. You will know whether USB is the storage destination, the computer connection, or both.
Can a photo scanner save directly to USB?
A photo scanner can save directly to USB only when it supports USB storage as a destination. A USB cable or USB port often means computer connectivity instead, so confirm the exact workflow before choosing a model.
Direct USB storage support usually means you can insert a compatible flash drive and save scans without keeping a computer beside the scanner. Computer USB support means the scanner connects to a computer, and scanning software handles saving, file names and folders.
Look for clear wording such as:
- Save to USB drive
- Scan to USB storage
- USB host port
- Save without a computer
Be careful with wording such as USB-powered or USB-connected. Those terms describe power or data transfer, not direct storage.
Direct storage can feel simpler for a small project. You can place the scanner where the photos already are, insert a drive, and scan without setting up a laptop nearby.
That simplicity comes with trade-offs. You may have less control over cropping, color correction and file naming when no computer software is guiding the scan.
A computer workflow asks for more setup at first. You usually install scanning software, connect the scanner, choose a destination folder, and watch the preview.
That extra step often pays off for a large collection. You can check each image, adjust settings, and keep files organized by year, event or family group.
It also helps with documents that sit alongside photos in the same box. OCR can turn pages into searchable text, which a plain flash drive save may not handle in the same way.
Check the manual or product page for the exact destination options. Look for whether the drive must be formatted in a certain way and whether the scanner creates its own folders.
Also check file formats, because sharing, archiving and enlarging may call for different choices. A format that is handy for quick sharing may not suit a long term archive.
If you need a scanner for paperwork as well as photos, our document scanners complete buying guide explains how feeding, OCR and file formats affect the choice.
Use that guide to weigh a photo focused model against a document focused one. The right pick depends on whether photos, paperwork, or a mix of both will fill most of your scanning time.
What should you check before choosing a photo scanner to USB?
Choose the scanner by matching its storage path, photo workflow and scan volume to your routine. Resolution matters, but it is only one part of the decision.
Direct USB storage or computer USB?
Start by writing down where you want the file to go. If the file must land on a flash drive without a computer, look specifically for direct USB storage support.
If you are comfortable scanning to a laptop or desktop, ordinary USB connectivity may be enough. Computer-based workflows can offer more control over cropping, color correction, file names and folders.
The Epson Workforce ES-50 is a computer-connected option rather than a direct-to-flash-drive photo station:
Its USB connection powers the scanner when attached to a computer, and it does not need batteries or an external power supply. It handles documents up to 8.5 x 72 in, receipts and ID cards, but its standard sheet capacity is 1, so it is better suited to individual documents than large photo batches.
Flatbed or sheet-fed photo handling?
A flatbed scanner lets you place a photo on glass and close the lid. This can suit a single print, a delicate image or an unusual shape.
A sheet-fed scanner pulls photos through the device. That can be faster for a large group of standard prints, but you should sort damaged or fragile photos first.
The flatbed offers a gentler routine for one off originals. You can look at the photo, place it carefully, and scan it while it stays flat and supported.
That care takes time when the box holds hundreds of prints. Each scan becomes a separate placing, closing and preview step, which can turn a weekend project into a longer one.
A sheet-fed model changes that pace. It can pull a stack through in sequence, so standard photos move quickly without manual handling for every image.
Speed still depends on condition. Curled, torn, sticky or very thin photos may need sorting before they go through, or they may suit a flatbed better.
Batched feeding also suits mixed sizes in some setups. A scanner that handles several sizes in one batch can reduce the need to restart for postcards or panoramas.
Resolution and cleanup tools deserve a look too. Higher resolution helps with enlargement, while tools for color restoration and red eye reduction can improve older prints.
Consider your workspace as well. A flatbed needs a stable surface and room to open the lid, while a sheet-fed scanner may sit in a smaller footprint.
For a broader comparison, see best scanners for photos, slides, and negatives. If you plan to feed many images, our guide on how to use an ADF photo scanner covers setup and handling.
Read those guides before you sort the collection. They can help you decide which photos need careful individual scans and which can move through a faster batch.
What resolution do you need?
Use 300 dpi for convenient sharing, 600 dpi for a stronger archive, and higher settings when you need to enlarge a small original. More resolution creates larger files, so choose based on how you will use the scan.
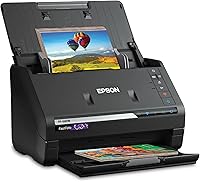
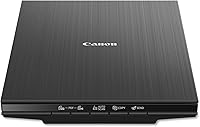
The Epson FastFoto FF-680W offers 300 dpi for sharing, 600 dpi TIFF for archiving and 1200 dpi for enlarging. The Canon CanoScan LiDE 400 provides 4800 x 4800 dpi resolution for detailed photo and image scans.
The Canon includes a USB Type-C cable for data and power, along with a vertical stand. Its flatbed design and 1-sheet capacity suit careful individual scans rather than a large automatic batch.
For smaller workspaces, compare our best compact photo scanner options.
Which photo scanner fits a large photo collection?
The Epson FastFoto FF-680W best fits a buyer who wants to process many standard prints quickly through a computer-based USB or wireless workflow. It can batch-scan up to 36 photos at a time and scan photos as quickly as 1 photo per second at 300 dpi.
It handles Polaroid photos, panoramas, postcards and photos up to 8 x 10 in. Its single-step duplex scanning can capture a photo and handwritten notes on the back in one scan.
The scanner includes Epson ScanSmart software with OCR for converting documents into readable text. It can scan documents up to 240 in and reaches up to 45 ppm/90 ipm for document scanning.
Auto enhancement, color restoration, red-eye reduction, de-skew, crop and rotate tools can help prepare scans. The included carrier sheet and cleaning cloth also support a more careful setup for delicate photos.
This model still does not mean direct USB-drive storage. Its USB connection is listed alongside wireless connectivity, so plan to use a computer-based workflow unless the exact setup confirms another destination.
Batch capacity is the main draw for a large collection. Loading up to 36 photos at a time means fewer stops to reload, which helps when the goal is to finish a whole box.
Scanning speed near 1 photo per second at 300 dpi also changes the routine. A faster run leaves more time for sorting, naming and checking files after the scan.
Duplex capture adds another layer of value. Family photos often carry names, dates or notes on the back, and capturing both sides in one pass keeps that context together.
That feature matters for documents too, since many pages carry text on both sides. A duplex path can reduce manual flipping and keep page order easier to follow.
Resolution choices let you match the scan to its purpose. Scan at 300 dpi for easy sharing, use 600 dpi TIFF for archiving, and reserve 1200 dpi for enlarging a smaller original.
Those higher settings create larger files and may slow the process. Many people scan once at a sharing setting for everyday use, then rescan a few favorites at a higher setting for archive copies.
The wireless option can help with placement. You can set the scanner near the photo boxes and keep the computer in a more comfortable spot.
Wi-Fi also means the scanner does not need to sit directly beside the computer for every scan. That flexibility suits a desk, a spare room or a shared home office.
Care still matters with a sheet-fed design. Use the carrier sheet for delicate items, dust photos lightly with the included cloth, and sort out damaged prints before a batch run.
For very large photo collections, our best photo scanners for multiple photos comparison may help you weigh batch capacity against control.
That comparison can also clarify whether a flatbed or a sheet-fed design suits your most fragile originals. Use it alongside the size and workflow checks to make a final choice.
How should you set up a photo scanner for USB saving?
Set up the scanner near the computer or storage device, then choose the file destination before scanning the whole collection. Run one test scan first so you can check orientation, color, file type and folder naming.
Use this process:
- Confirm whether USB means direct flash-drive storage or computer connection.
- Install the required scanning software if the workflow uses a computer.
- Connect the scanner with the correct USB cable and attach power when required.
- Clean dust from the photo and scanner surface with suitable care.
- Choose a resolution that matches sharing, archiving or enlargement.
- Scan one photo and open the saved file.
- Check the image before processing the rest.
- Create folders by event, year or family group.
- Back up the finished files to a second location.
A test scan also reveals whether the photo sits straight in the feeder or on the glass. Small alignment issues are easy to fix at the start and harder to correct after a full batch.
Check color and brightness on that first file as well. Older prints may scan darker or lighter than expected, and a quick adjustment can improve the whole set.
Confirm the file type before you continue. A sharing format may be smaller, while an archive format may preserve more detail for future use.
File naming deserves attention too. Consistent names make it easier to find a photo months later, especially when the collection spans several years.
Folders help in the same way. Sorting by event, year or family group during the scan can save hours of later sorting.
Power and cable placement should be settled before the first real batch. A loose connection or a missing adapter can interrupt a run and leave the collection in a mixed state.
Keep the workspace tidy while you work. Stacks of unscanned photos, scanned photos and photos to review should stay separate so nothing is scanned twice or skipped.
Avoid feeding curled, torn or delicate photos into a sheet-fed scanner until you know the handling limits. A flatbed can be the safer choice for one fragile original.
Back up finished files as you go rather than waiting until the end. A second copy on another drive or in cloud storage protects the work if a computer fails.
Store originals safely after scanning as well. Digital files are handy for sharing, but keeping the prints in a dry place preserves the source material.
Is USB enough for photo scanning?
USB is enough when your goal is to connect the scanner to a computer and save files through scanning software. USB is not enough evidence of direct flash-drive saving, so that feature must be confirmed separately.
The right choice depends on the workflow:
- Choose the Epson FastFoto FF-680W for large photo batches, duplex capture and computer-based USB or Wi-Fi scanning.
- Choose the Epson Workforce ES-50 for portable, single-sheet document scanning through a computer.
- Choose the Canon CanoScan LiDE 400 for detailed flatbed photo scans with USB data and power.
Each model suits a different kind of project. The FastFoto fits a large box of standard prints that need fast processing and two sided capture.
The WorkForce ES-50 fits a lighter routine built around single documents. It is compact and USB powered through a computer, which suits travel, a small desk or occasional paperwork.
The CanoScan LiDE 400 fits careful individual scans. Its flatbed design and high resolution suit detailed photos that deserve close attention rather than a quick batch run.
Trade-offs should guide the final decision. Batch speed can save time, but a flatbed may handle fragile originals more gently.
Resolution also needs balance. Higher settings capture more detail, yet they create larger files that take longer to store and share.
Computer based workflows add setup, but they give more control over preview, cropping, color and folders. That control can matter when the collection includes mixed sizes or mixed conditions.
Direct storage would remove the computer from the routine, yet it still needs to be confirmed as a feature. A USB port on its own should not be read as proof of that workflow.
Think about backups before you start scanning. A clear plan for a second copy protects months of work from a failed drive or an accidental deletion.
If your next question is how the scans will become physical prints, read which printer is better for printing photos and why inkjet is better for photo printing. For bound originals rather than loose photos, see our guide to choosing a book scanner with a cradle.
Those next guides can help you plan the full path from scan to print. Keeping the scanner workflow and the print workflow in mind together leads to a smoother project from start to finish.
Frequently asked questions
Can a photo scanner save directly to a USB drive?
Some scanners support direct saving to USB storage, but a USB port alone does not prove that feature. Many models use USB only to connect to a computer, where scanning software saves the file.
Check for direct USB storage support before buying.
What does photo scanner to USB mean?
Photo scanner to USB can mean two different workflows: scanning directly to a USB flash drive, or connecting the scanner to a computer with a USB cable. Confirm which workflow the model supports, then check whether it needs software, a power adapter or a computer.
Is 600 dpi enough for scanning photos?
600 dpi is a useful starting point for archiving standard prints and sharing them digitally. Higher resolution can help when you plan to enlarge a small photo, but it creates larger files and may increase scan time.
Is a flatbed or sheet-fed scanner better for photos?
A flatbed scanner suits delicate, thick or unusual photos because each image rests on the glass. A sheet-fed scanner can save time on batches of standard prints, but you should follow its handling guidance for older or fragile photos.