How to Use a Fellowes Laminating Machine
To use a Fellowes laminating machine, select the right pouch thickness, let the machine warm up fully, then feed the sealed edge first and keep the pouch straight. Use the release lever if a pouch jams, and allow the finished sheet to cool flat.
On this page (9 sections)
- What do the Fellowes controls do?
- How do you pick the right pouch for the job?
- How do you prepare a pouch before feeding it?
- How do you warm up and feed the pouch correctly?
- What heat setting should you use for 3 mil and 5 mil pouches?
- How do you fix jams, wrinkles, and cloudy seals?
- How do you set up and care for the machine between jobs?
- Which machine fits your desk if you are not buying Fellowes?
- What is the fastest safe routine for everyday lamination?
To learn how to use the Fellowes laminating machine, load the paper into a matching pouch, close the pouch, warm up the machine, and feed the sealed edge first. That order keeps the seal even and helps stop jams.
This guide explains each step in plain terms.
You will also see how the Fellowes controls differ from other 9-inch machines. Knowing those small differences helps you pick the right setting and avoid cloudy sheets.
What do the Fellowes controls do?
The Fellowes FEL5738201 uses a heat setting for 3 mil or 5 mil pouches, plus a release lever and auto shut-off. The release lever lets you disengage a pouch so you can re-center or remove it.
Auto shut-off helps prevent overheating when the machine sits idle.
The machine is made for home or home office use. It accepts documents up to 9.5 inches wide, so letter and legal sizes fit in the right pouch orientation.
It also works with self-adhesive cold-lamination pouches, which is useful when you do not want heat for a delicate sheet.
Fellowes says the machine heats up in four minutes. That time matters, because a cold machine can seal poorly.
Wait for the ready signal on your model before you feed the first pouch.
Our score weighs specs, features and buyer feedback against what you are shopping for. For this task, the Fellowes score of 9.5 reflects its clear pouch settings and release lever for routine home use.
How do you pick the right pouch for the job?
Match the pouch thickness to the paper and to the machine setting. Use 3 mil for normal documents, photos, and card stock.
Use 5 mil when you want a stiffer, more protective cover for papers that get handled often.
Check the pouch size before you load anything. A pouch that is too small will force you to fold paper, and a pouch that is too large can bunch or seal unevenly.
Keep a small border of film around the paper on all sides where the pouch design allows it.
Leave time to trim excess film after cooling if you want a neat edge. Trim only after the sheet cools, so the seal does not pull apart.
For ID badges, pouch size matters even more, so our guide to best laminating pouches for id badges helps you match the format first.
For general pouch use, our walkthrough on how to use Scotch laminating pouches explains sealed-edge handling in the same step order. That habit transfers well to Fellowes pouches.
How do you prepare a pouch before feeding it?
Place the paper inside the pouch, smooth it flat, and close the pouch without trapping air. Air pockets can show as bubbles after heating.
Wipe dusty or oily paper with a dry cloth before sealing.
Center the paper so the film borders look even. If the paper shifts to one side, the seal on the other side may look thin.
For photos, handle them by the edges to avoid fingerprints that heat can set into the film.
Do not overload a pouch with thick card stock unless the pouch and machine settings allow it. Thick items can slow the feed and stress the rollers.
If an item is too thick, use a thinner sheet or a larger pouch made for it.
Some small items benefit from a best laminator carrier sheet to keep them centered. A carrier also helps when the item is much smaller than letter size.
Remove the carrier sheet before the pouch travels through, following the carrier instructions.
How do you warm up and feed the pouch correctly?
Turn the machine on, select the pouch setting, wait for the ready signal, then feed the sealed edge first. Keep your hands clear of the entry slot and let the rollers pull the pouch through.
Do not push or pull against the rollers.
Keep the pouch straight and centered as it enters. A slight angle can cause one corner to catch or seal unevenly.
If the pouch starts to skew, stop and use the release lever where your model has one.
Let the pouch exit fully before you touch it. Hot film can feel soft and may smudge if you grip it too soon.
Place the finished sheet on a flat surface and let it cool.
The Amazon Basics model in this guide uses a quick 3 to 5 minute warm up with a ready indicator light. Fellowes says the FEL5738201 heats up in four minutes.
In both cases, the ready signal matters more than a timer you set on your phone.
What heat setting should you use for 3 mil and 5 mil pouches?
Use the 3 mil setting for 3 mil pouches and the 5 mil setting for 5 mil pouches. The thickness of the film controls how much heat and time the seal needs.
A mismatch can leave the film cloudy or under-sealed.
The Fellowes FEL5738201 has heat settings for 3 mil and 5 mil hot-lamination pouches. That makes the choice simple once you know your pouch thickness.
Read the pouch package, not just the size on the front.
The Scotch PRO TL906 also has two temperature settings for 3 mil and 5 mil pouches up to 9 inches wide. It is listed with two heated rollers and a rate of 15 inches per minute.
That speed is fast enough for classroom batches, but you should still feed one pouch at a time.
If results look cloudy, check the setting first. Then check whether the machine was fully warm.
Most cloudy seals trace back to one of those two causes.
How do you fix jams, wrinkles, and cloudy seals?
Stop feeding, use the release lever to disengage the pouch, and remove it without forcing it. Force can tear the film and leave residue in the rollers.
After clearing a jam, let the machine return to temperature before you try another pouch.
Wrinkles often come from feeding at an angle or from a pouch that was not flat. Smooth the pouch before feeding and keep it centered.
A carrier sheet can help with small or flexible items.
Cloudy seals often mean the machine was not ready or the setting did not match the pouch. Re-run a test pouch on a plain sheet before you redo an important document.
That test costs one pouch and saves the original.
If film sticks inside, turn the machine off and let it cool before cleaning. Use only cleaning methods allowed in your manual.
Never scrape hot rollers with a sharp tool.
For a broader look at machine types before you buy, our laminator machine for paper guide explains thermal and cold options. That context helps when a jam makes you wonder if you chose the right type.
How do you set up and care for the machine between jobs?
Place the laminator on a flat, heat-safe surface with room for the pouch to exit without bending. Keep the entry slot clear and the power cord away from the hot path.
Do not laminate hardware, cloth, wood, foam sheets, foil, or plastic sheets where a manual bars those materials.
Store the machine dry and dust-free. Dust inside the slot can mark the next pouch.
A quick wipe of the outside with a dry cloth is enough for most home use.
Let the machine cool before you move or store it. Some models have cord storage or foldable trays, but you should still wait until the rollers cool.
Check your manual for the exact storage steps for your model.
If you laminate often, keep spare pouches in the two thicknesses you use most. Our picks for the best fellowes laminator machine page can help you compare models if your current one no longer fits your volume.
Which machine fits your desk if you are not buying Fellowes?
Pick by pouch width, heat settings, warm up time, and jam release, not by looks alone. All three machines here handle pouches up to about 9 inches wide.
The Fellowes FEL5738201 is listed at 14.56 by 7 by 3.06 inches and 3 pounds.
The Amazon Basics model is listed at about 13.9 by 2.6 by 4.4 inches and 2.5 pounds. The Scotch PRO TL906 is listed at 15.8 by 4 by 4 inches and 3.2 pounds.
The Fellowes model suits home and home office users who want a release lever and auto shut-off. The Amazon Basics model suits buyers who want a lighter machine with a 3 to 5 minute warm up and a jam release lever.
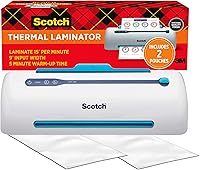
The Scotch model suits teachers and office users who want two heated rollers and a listed rate of 15 inches per minute.
Our detailed fellowes spectra 95 laminator reviews page covers the Fellowes model in depth. Use it if the FEL5738201 is your shortlist pick.
For office gear beyond lamination, our paper shredder machine guide covers the next desk purchase many buyers make.
What is the fastest safe routine for everyday lamination?
Warm up fully, feed one pouch at a time sealed edge first, and cool each sheet flat before stacking. That routine works across all three machines here.
It also makes the most common mistakes easy to spot.
Start with the right pouch, then the right setting. After the machine is ready, feed slowly enough to keep the pouch straight.
If you batch a stack of sheets, pause between pouches so each one exits cleanly.
For binding projects that need a different finish, our book binding machine guide covers the next step after lamination. Lamination protects single sheets, while binding holds a full set together.
Use this how to use the Fellowes laminating machine routine as your default, and adjust only the pouch thickness and setting. That simple order gives you clean seals with fewer wasted pouches.
Frequently asked questions
How long should a Fellowes laminator warm up?
The FEL5738201 is listed with a 4 minute warm up time. Wait until the machine signals it is ready before feeding a pouch.
Feeding early can leave the seal cloudy or incomplete, so use the ready signal rather than the clock alone.
What pouch thickness should I use?
Use 3 mil pouches for everyday papers and 5 mil pouches for items that need a stiffer cover. Match the machine setting to the pouch you loaded.
The Fellowes FEL5738201 works with 3 mil and 5 mil hot pouches, plus self-adhesive cold pouches.
Which way do I feed the pouch into the laminator?
Feed the sealed edge first, with the open edge trailing behind. Keep the pouch centered and straight as it enters.
A carrier sheet can help with small items, and you should never feed a pouch with the open edge first.