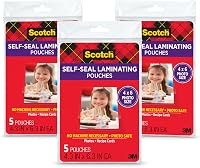
How to Use a Desktop Laminator
To use a desktop laminator, warm the machine, place your document in the right pouch, set the heat for the pouch thickness, and feed it sealed edge first. Wait for the ready light, guide the pouch straight through, and let the finished sheet cool flat.
On this page (12 sections)
- How do desktop laminators work?
- What supplies do you need before you start?
- How do you prepare a pouch and document?
- How do you warm up and set the heat?
- How do you feed the pouch through the laminator?
- Which 3 mil or 5 mil setting should you use?
- How do you fix jams, bubbles, and cloudy seals?
- How do you finish, cool, and store laminated sheets?
- When should you pick a 9 inch desktop model?
- How do you clean and care for a desktop laminator?
- Which desktop laminator setup fits your desk?
- How do you get clean results on your first try?
To use a desktop laminator, warm the machine, place your document in the right pouch, set the heat for the pouch thickness, and feed it sealed edge first. This guide explains desktop laminators how to use in plain steps, so you can protect papers and photos without bubbles, waves, or jams.
A desktop thermal laminator uses heat and pressure rollers to seal a pouch around paper. You set the heat, wait for the ready signal, and feed the pouch through once.
The work is simple, but pouch matching and feeding matter more than speed.
How do desktop laminators work?
A desktop laminator works by heating a plastic pouch and pressing it around your document as it passes through rollers. Thermal models need warm-up time, while cold models use sticky pouches and no heat.
Heat melts the inside of the pouch so it bonds to the paper. Pressure rollers push out air and seal the edges.
That heat is also the main limit, since pouch thickness and heat setting must match. A wrong setting can leave the seal cloudy, loose or wavy.
Our laminator machine for paper guide covers the bigger buying choices.
What supplies do you need before you start?
You need the laminator, pouches that match its width and heat settings, and a clean flat surface. Trim paper first if it is larger than the pouch, and keep loose items away from the feed slot.
Choose a pouch that fits the document with a small border on all sides. The border helps the seal hold and keeps paper from touching the heated rollers.
For letter paper, use a letter size pouch.
Check the pouch thickness before you warm the machine. Most home desktop models use 3 mil or 5 mil pouches, and the mil number tells you how thick the film is.
Keep the counter clear so the pouch can enter straight and exit without bending.
How do you prepare a pouch and document?
Prepare the pouch by opening the sealed side, sliding the document in, and checking that it sits straight. Leave a small border around the paper, and smooth out curls before you seal.
Place the document on a clean surface and wipe off dust, staples, or paper clips. Small debris can show through clear film and can catch in the rollers.
If the paper is curled, place a book on it for a minute to flatten it.
Open the pouch and slide the paper in from the open side. Keep the paper centered so the sealed edge stays clean.
If the paper shifts, take it out and start again rather than trying to fix it inside the pouch.
Check the fit before heat. The pouch should close flat with no folds over the paper.
A fold at the edge can turn into a hard line after it passes through the rollers.
How do you warm up and set the heat?
Warm up the laminator by plugging it in, choosing the heat setting for your pouch, and waiting for the ready light. Do not feed a pouch before the light shows ready.
For 3 mil pouches, use the lower heat setting. For 5 mil pouches, use the higher heat setting.
Amazon Basics separates those settings for normal documents and photos at 3 mil and thinner papers at 5 mil.
The Scotch PRO TL906 also uses two temperature settings and a button that turns green when ready. Scotch says it warms up in five to six minutes and runs at 15 inches per minute.
If the light is not ready, wait. A cold roller can leave the seal loose or cloudy.
How do you feed the pouch through the laminator?
Feed the pouch sealed edge first, straight and centered, with light guidance only. Let the rollers pull it through, and do not push or pull harder.
Hold the pouch level at the feed slot. The sealed edge should enter first, and the open edge should follow last.
Keep your fingers clear of the slot, since the rollers and pouch get hot.
Stand at the exit side before you start. Catch the sheet as it comes out and lay it flat.
If you let it hang or bend while hot, the film can curl or crease.
Do not stack fresh sheets on top of each other right away. Heat can make them stick or warp.
Give each finished sheet a minute to cool on a flat surface.
Which 3 mil or 5 mil setting should you use?
Use 3 mil for normal documents, photos, and card stock, and 5 mil for thinner papers that need a firmer seal. Match the setting to the pouch itself.
A 3 mil pouch seals with less heat and suits recipes, signs and school pages without making them stiff. Amazon Basics pairs 3 mil with normal documents, photos and card stock, for paper from 50 to 160 grams.
A 5 mil pouch is thicker and gives a sturdier feel for thinner papers. Amazon Basics pairs its 5 mil setting with paper from 50 to 100 grams.
If the seal looks cloudy the setting may be too low, and if the sheet is very wavy it may be too high, so change one thing at a time.
How do you fix jams, bubbles, and cloudy seals?
Fix a jam by turning the machine off, using the jam release lever, and pulling the pouch gently forward. Never yank it backward against the rollers.
Amazon Basics includes a jam release lever for clearing jams. Use it as soon as the pouch stops moving, since a hot pouch left in the rollers can stick if forced.
For bubbles, check that the document sat flat and centered. Smooth the paper, reopen the pouch, and try a fresh one.
For a cloudy seal, check heat and warm-up first. Use a new pouch if the machine was not ready.
If you are choosing between heat and no-heat options, our cold vs hot laminator comparison can help.
How do you finish, cool, and store laminated sheets?
Finish each sheet by laying it flat on the exit side, letting it cool for about a minute, and handling it by the edges. Do not bend it while the film is still soft.
The film sets as it cools, so flat storage keeps the edges straight. If you need to trim excess film, wait until the sheet is fully cool, then cut slowly with small scissors.
Store finished sheets flat in a folder or drawer and stack them only once cool. Keep them away from direct heat, such as a sunny window or a hot car.
For bulk jobs, pause between pouches if the machine feels very hot or the seals start to vary.
When should you pick a 9 inch desktop model?
Pick a 9 inch model if your pages fit within 9 inches wide, such as letter, legal, photos, and cards. For brand options, compare Fellowes laminators by pouch size and daily volume.
Measure the widest item before you buy, since the pouch must fit too. Both models here handle documents up to 9 inches wide and accept 3 mil and 5 mil pouches.
Amazon Basics measures about 13.9 by 2.6 by 4.4 inches and weighs 2.5 pounds. The Scotch TL906 measures about 15.8 by 4 by 4 inches and weighs 3.2 pounds.
Amazon Basics warms up in 3 to 5 minutes and has a jam release lever. The Scotch warms up in five to six minutes, runs at 15 inches per minute, and includes two pouches.
For smaller pages, see our best 9 inch laminator picks and best laminator with paper cutter.
How do you clean and care for a desktop laminator?
Care for a desktop laminator by turning it off after use, letting it cool, and wiping the outside and roller area with a dry cloth. Keep adhesive, staples and paper clips away from the feed slot.
Unplug the machine before cleaning inside the slot. Use a dry, soft cloth and follow the manual for any cleaner you use.
Do not pour water into the rollers or use a wet cloth near the cord. Run a spare pouch only if your manual allows it.
Store the machine as the manual directs, with the cord coiled loosely. If the cord or plug looks damaged, stop using it and check the manual for service steps.
For other brands, see how to use swingline gbc laminator and scotch tl902 thermal laminator how to use.
Which desktop laminator setup fits your desk?
Choose the Amazon Basics 9 inch model if you want a lighter machine with a jam release lever and two pouch heat settings. It suits home desks where space and simple controls matter most.
Choose the Scotch PRO TL906 if you want a slightly larger body, a green ready button, and a stated speed of 15 inches per minute. It suits teachers and home offices that laminate signs, flyers and school pages often.
For home use in general, our best laminator for home use guide can help you narrow the field. Keep clear space on both sides, since even a compact laminator needs room.
Our best printer stand black picks may help you plan the desk.
How do you get clean results on your first try?
Clean results come from matching the pouch to the heat, waiting for ready, and feeding the sealed edge first. Most problems trace back to one of those three steps.
Run one test pouch with a scrap sheet first if you are new to the machine. Check for bubbles, cloudiness, and edge sealing before you use a photo or an official paper.
That test costs one pouch and can save the real document. Keep a small routine at your desk: pouch size, heat setting, ready light, sealed edge first, flat cooling.
When that routine is the same every time, desktop lamination gets predictable. Use it, check your first sheet, and adjust only one variable at a time.
Frequently asked questions
How long does a desktop laminator take to warm up?
Most 9 inch thermal models warm up in about 3 to 6 minutes. Wait for the ready light or green button, since feeding a pouch too early can leave the seal weak or cloudy.
Amazon Basics gives 3 to 5 minutes and Scotch gives 5 to 6 minutes for its TL906.
Which way does a laminating pouch go in?
Feed the sealed edge first and the open edge last. Keep the pouch centered and straight so both sides seal evenly.
If the pouch is crooked, the rollers can pull it off course and trap air or folds.
Can I use 3 mil and 5 mil pouches in the same machine?
Many 9 inch desktop models accept both, but you must match the heat setting to the pouch. Use the 3 mil setting for thinner film and the 5 mil setting for thicker film.
Check your machine manual before you start.
What should I do if a pouch jams?
Turn the machine off and use the jam release lever if your model has one. Pull the pouch gently in the direction of feed and never force it backward.
Let the rollers cool before you try another pouch.